3 Different Ways to Implement On-Page SEO for Events [Tutorial]

I recognise that, in a previous post, I waxed lyrical about on-page SEO for events, but I didn’t quite go into depth about how to implement it.
Today we’ll take a few minutes to go through event page SEO tutorials for three popular platforms and all the places keywords should live for additional event visibility.
I’ll cover how to SEO-optimise a Tito event, an event page hosted on WordPress (with or without Yoast) and how to SEO-optimise event pages hosted on the HubSpot COS.
How to implement on-page SEO for events in Tito:
A good deal of our readers are Tito customers, so if that’s you, ?.

Though this comes with a little bias, we’ve designed Tito system so that it’s easy to optimise the on-page keyword positions that are most commonly used. Here’s how:
Title/H1 tags:
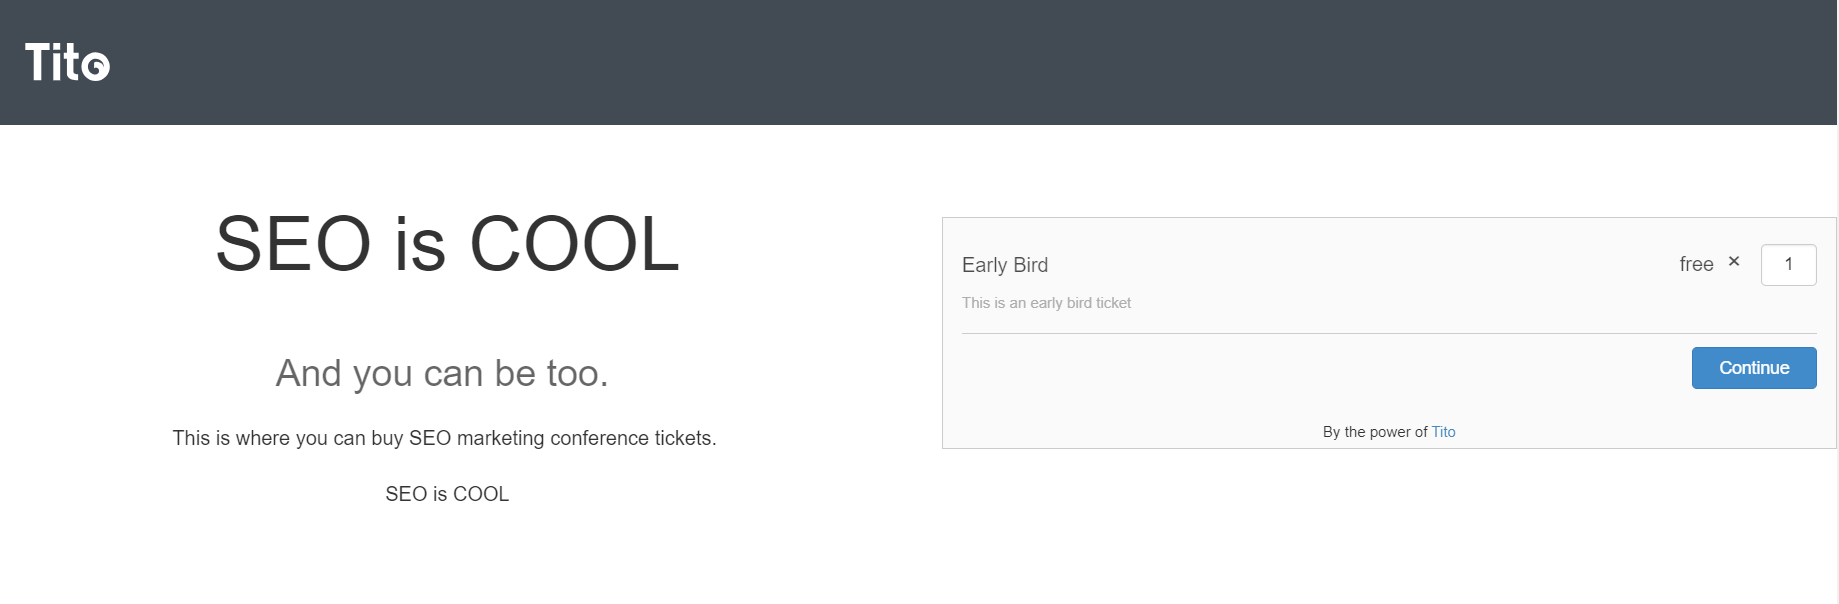
The name of your event is usually a good starting point to let people know what the whole shindig will be about. The demo event that I’ll be using as an example for this set-up is “SEO is Cool” (for somewhat obvious reasons.)
In Tito, we give you a default Tito Homepage that will look something like this when you’re just getting started:
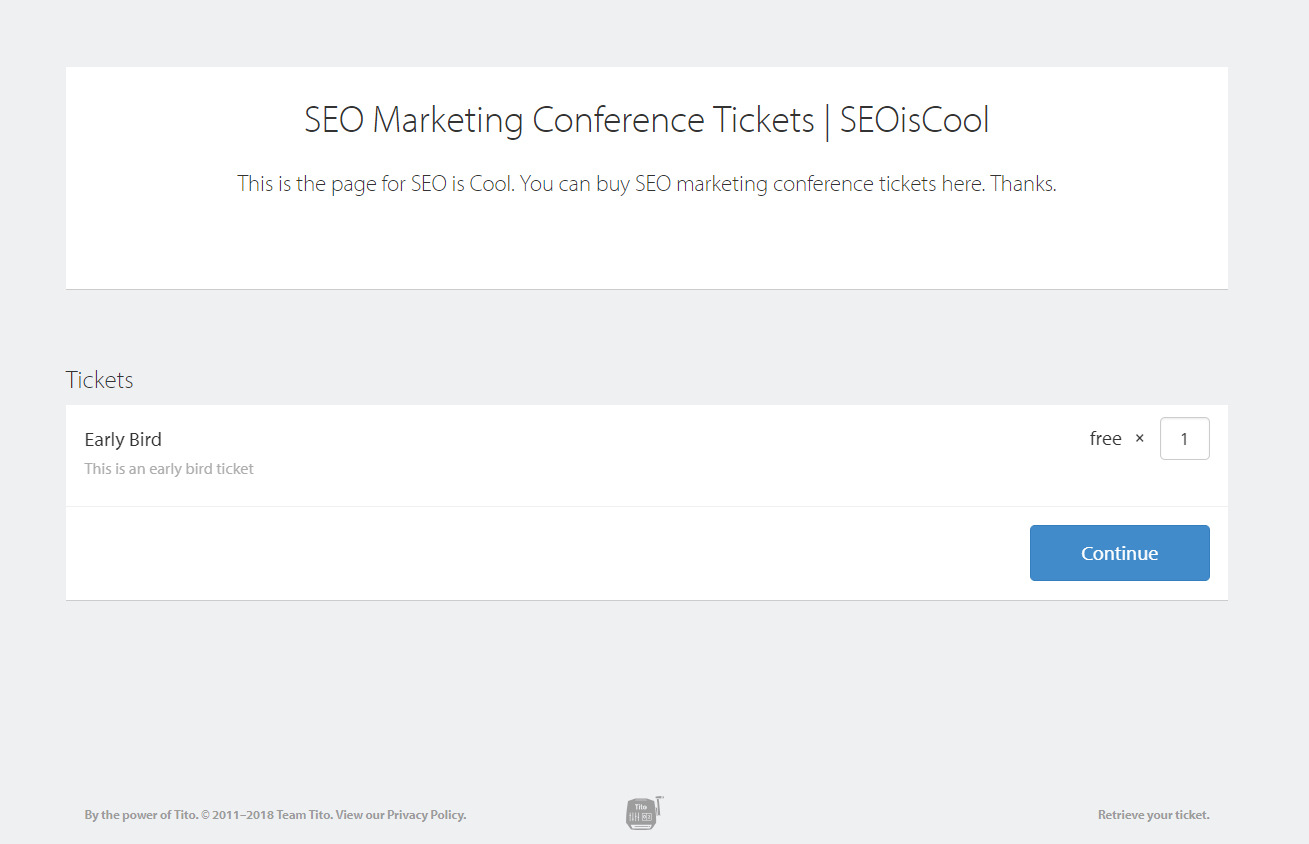
You can customise this as you please, but to optimise it for SEO purposes, you need only follow the following steps:
To edit your Title/H1 tag, simply navigate to your Tito account, go to Customize, and then to Basics. There you’ll be able to input your Title and adjust it as you please. A good rule of thumb is to put your desired keyword and name of the event in this field in the format “Long tail keyword | Name of event”.

(Click to enlarge in a new tab ?)
In this case, I’ve gone for “SEO Marketing Conference Tickets | SEO is Cool 2018” which is within the recommended 50-60 character limit for titles to display correctly in Google.
Note: If your conference has a bit of a reputation already, you might want to just optimise for your conference name, which is totally cool. But, if you’re in the discovery phase, doing something like this where you aim for a long-tail keyword will encourage people searching for the theme of the conference to come to your site. You also don’t need to go for something as convoluted as the keyword I’ve chosen.
URL:
Conveniently located under your Basic settings in the same section of your Tito account as the Title field we’ve just discussed, you can scroll down to URL Settings.

(Click to enlarge in a new tab ?)
Here, you can edit your Event URL which will include the name of your Tito account. Here, you need only add the keyword you’re going after as the suffix for your URL as I’ve shown in the screengrab above.
A quick note on 301 redirects: If your event is already live and people are accessing the original URL, you’ll want to set up a 301 redirect so that your original URL still leads to your page after you’ve updated your URL to include your target keyword. For a comprehensive understanding of what this is, how it works, and how to do it, I recommend this article from Moz.
Don’t have a Tito account? You can sign up here.
Body keywords:
This is where you can get a little more creative. Body keywords are those keywords that you include in the main copy of your event page.
In Tito, this is found under Customize -> Homepage -> Additional info
Here, you’re setting the stage for your event. While describing who the event is for and what topics will be covered and by whom, you can include the keyword you’re optimising for throughout. However, it’s not advisable to put it everywhere, or to “stuff” it in. Rather, aim to use the keyword where it naturally fits into the flow of the language you’re using. Remember, always, that SEO “rules” are secondary to user experience.
Since this web page is truly about your event, and that is truly about the keyword you’ve chosen, this should be a simple task. The guideline I’d recommend is to use a keyword three times in your body, if it fits. If that doesn’t work within the word count of what you’re writing, include it at least once so that search engines at least know what you’re going for. If you can include synonyms of your keyword, even better.
Meta description:
To add your meta description (i.e. the snippet that comes up in Google when your event shows up in search results), navigate to Short Description under Customize -> Homepage.

(Click to enlarge in new tab ?)
Try to keep this brief and avoid any punctuation other than “,” “-” and “.” as these annoy Google (to put it lightly) and may cause them to disregard your entire meta-description when considering where to display your page.
Alt-tags:
We talked a little about alt-tags in our first post on the topic of SEO, but for a refresh, they’re tags that describe another element on a webpage that isn’t text-based, usually images.

In Tito, you’ll usually be uploading a banner image and a logo. For your logo, use a branded keyword (in my case, it would be “SEO is Cool”) and for your header, use the same keyword you’ve been using throughout the process.
For ease, simply save the files you want to use for each of these as the keywords you’re aiming to rank for, and then upload them to your Tito account under Basic settings -> Logo and Homepage -> Banner, respectively. The image description will then be saved as the image name and, thus, your keywords.
And, voila, you’re done! ?
How to implement on-page SEO for events in WordPress:
![]()
30% of all the websites that exist run on WordPress. It’s one of the most intuitive CMS systems to use, and also one of the most flexible. In this example, I’ll show you the very basics of on-page SEO set-up in the system.
P.S. We also have a WordPress plug-in, if you’re so inclined.
Title/H1 tags & URL:
(Click to enlarge in new tab ?)
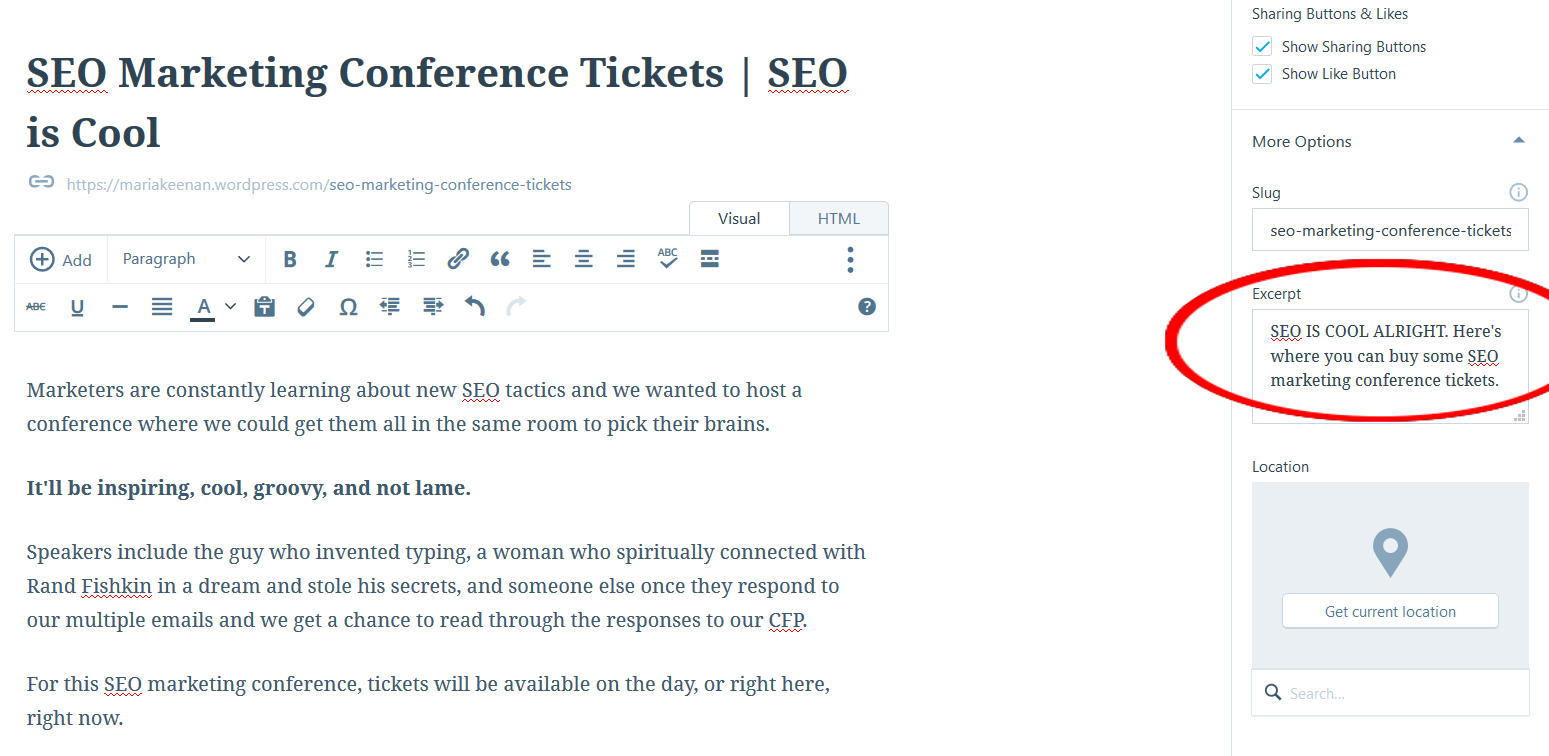
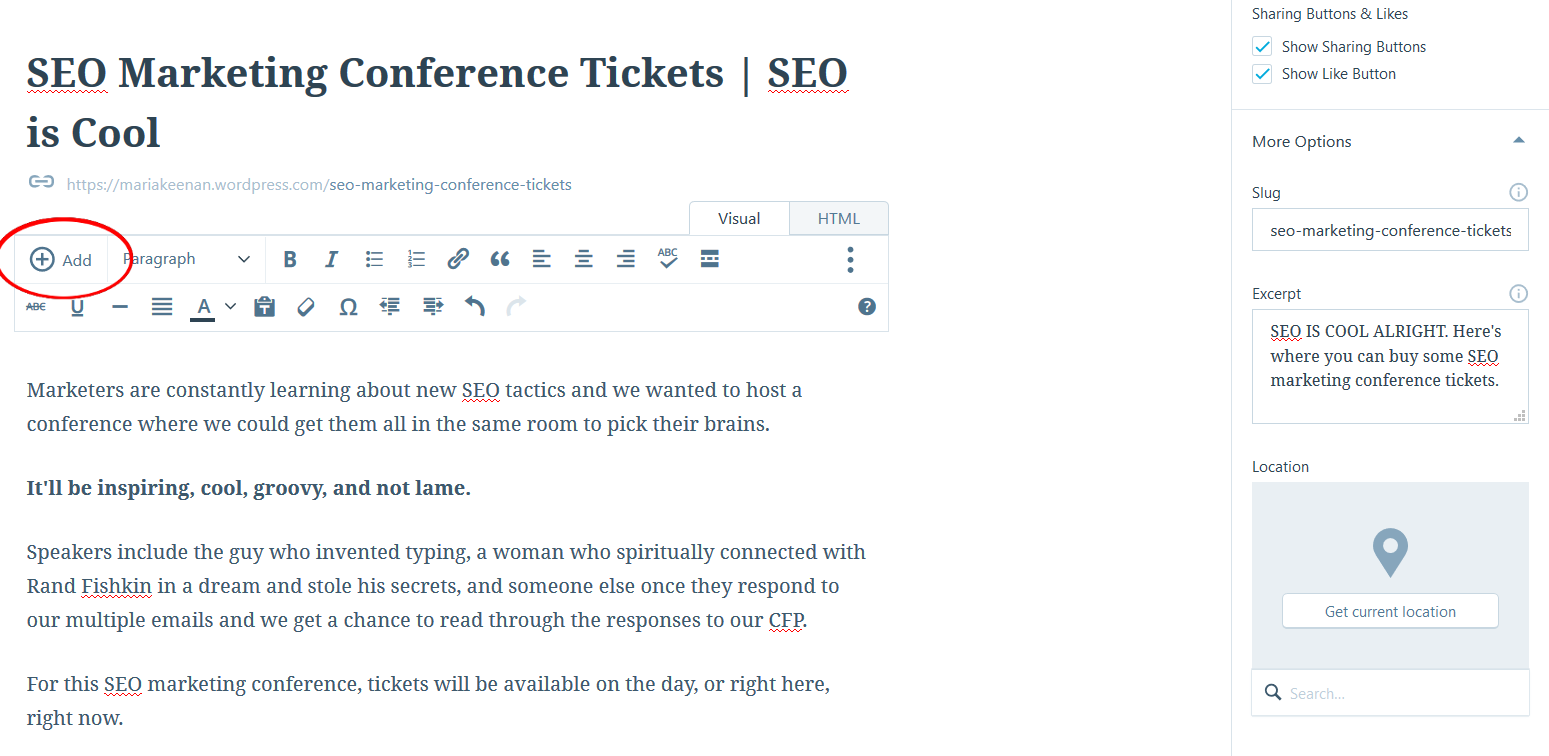
In the above example, we’re following the exact same syntax as we did for the example set-up in Tito. Our title goes in the Header section. Though under a different name, the URL is editable right below this section, and it auto-updates the Slug (shown in the right sidebar), but you can also edit the URL from that field if you prefer.
Please remember to keep in mind that you might want to set up a 301 redirect. (See: the previous Tito section.)
Body keywords:
It’s hard to sell tickets by describing your events in terms of default Latin text edited to sound like Snoop Dogg, so I’d confidently recommend updating your body copy so that it means something.
In all seriousness though, WordPress caters to everyone when it comes to its content editor. In the example below, you can see just how easy it is to swap between the Visual text editor and the editor that allows you to directly work through HTML:
Again, my suggestion is to use your target keyword approximately three times, but within reason. Obviously, your keyword won’t be as large and hard to fit in as mine (especially if you just want to be found for your conference name), so it should be a little easier.
Meta description:
The ever-pleasant meta description field can be found under Excerpt in WordPress:
Alt-tags:
One of my personal favourite UI components of WordPress is the multitude of customisable options you get when using multimedia on your page.
I would gush about this for a while, but we’re here for alt-tags, so as promised, WordPress has a very simple methodology for editing those.
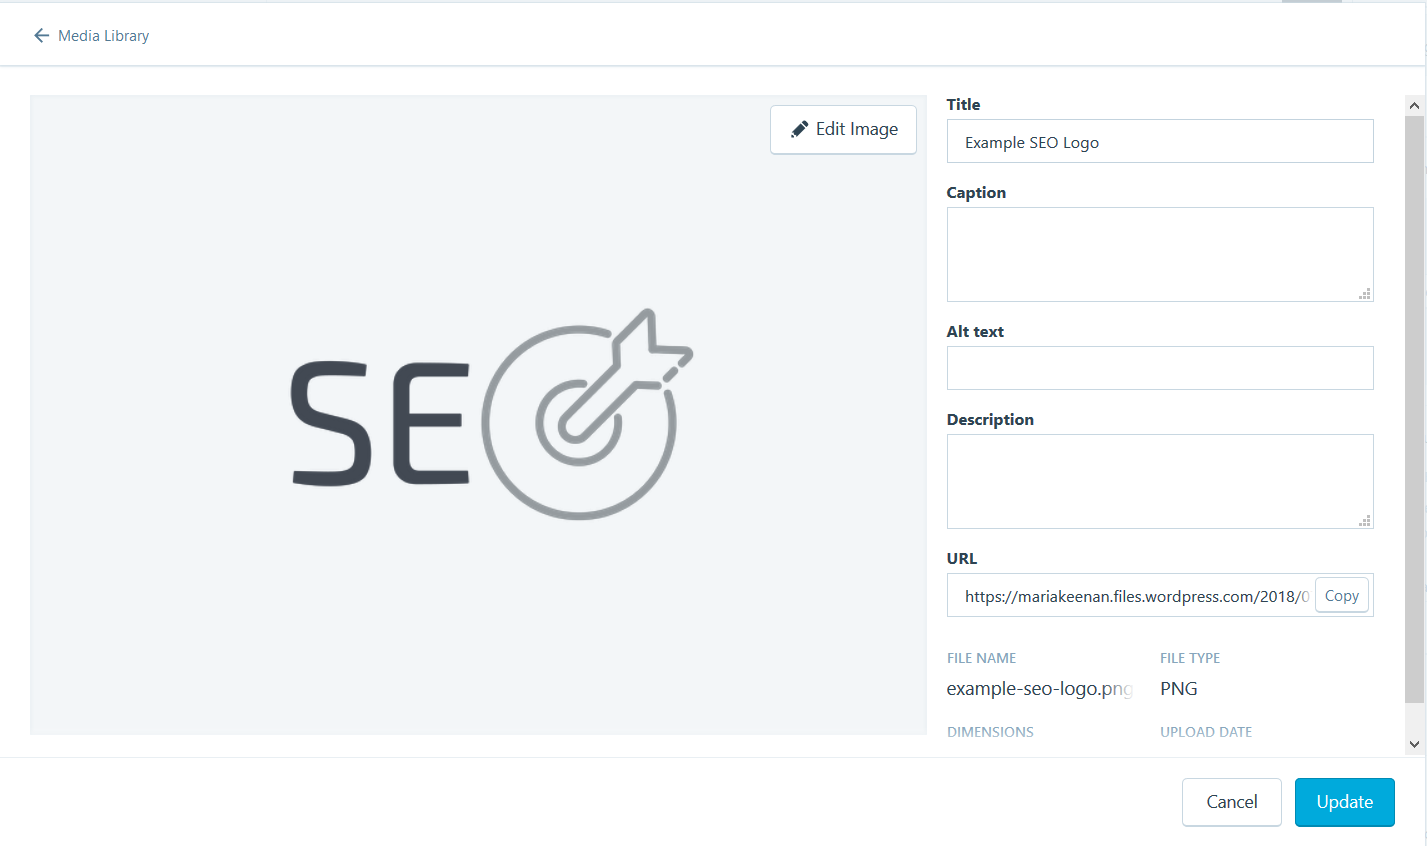
Simply navigate to the Add button in the page editor:
From there, you can “add” whatever you like when it comes to images, videos, etc. After you’ve uploaded your logo, header, or body image, you can then customise your alt-tags in the Alt text field that will appear beside your image:
If you want to get a little more sophisticated when it comes to SEO within WordPress, my personal recommendation is to just use Yoast. For the majority of business needs, the free package is more than enough for your first few SEO campaigns, and if you do want to upgrade to things like automatic redirects, full support, and an ad-free interface then it’s €79 for a whole year. #notspon
How to implement on-page SEO for events in HubSpot :
With an 18.97% market share according to Datanyze, HubSpot is the most popular marketing automation platform on offer.
![]()
When integrating your events with HubSpot, it’s a pretty straightforward process most of the time.
Thankfully, we’ve already written about how you can integrate new registrations through Tito to log automatically in your HubSpot CRM (?), but when making a ticket page for registrations on a HubSpot-hosted page, the best plan of action is to add a form or the Tito Widget to a page template in the HubSpot COS. We’ll go with the latter in this example.
To add the Tito widget to a HubSpot COS page, navigate to Marketing -> Files and Templates -> Design Tools.
There you’ll be brought to the library of your existing (or brand new!) COS pages. Here, you can navigate to File -> New File and get started.

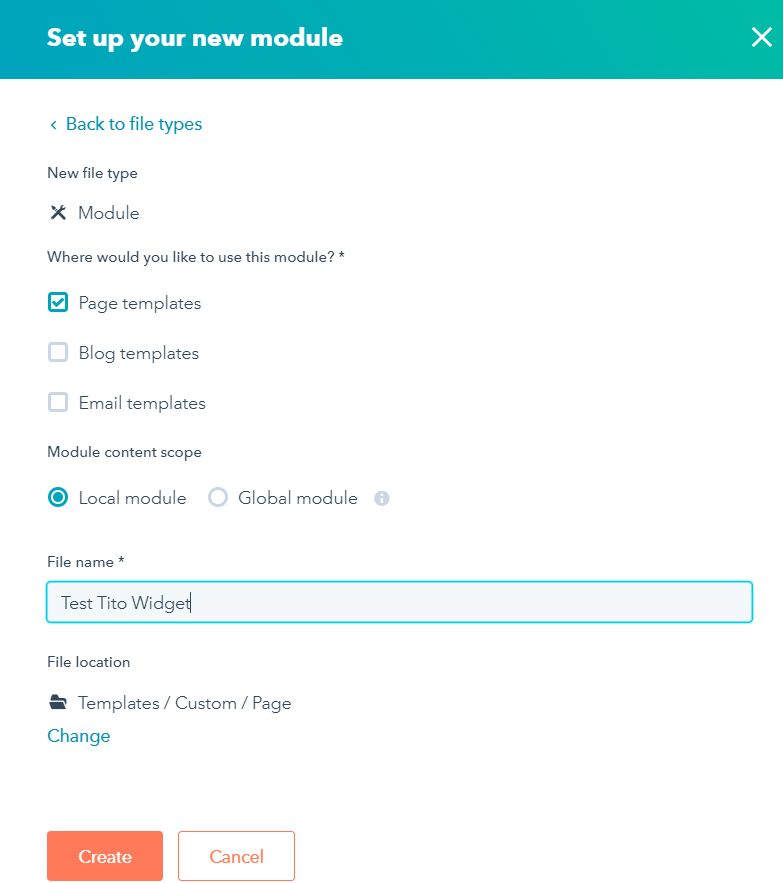
To use the Tito widget, you’ll want to choose the Module option under Components (pictured above). You’ll then be prompted to choose from a few options as to where you want the widget to be hosted. The easiest way to set this up is pictured below. (But you don’t need to call it Test Tito Widget, if you don’t want to.)
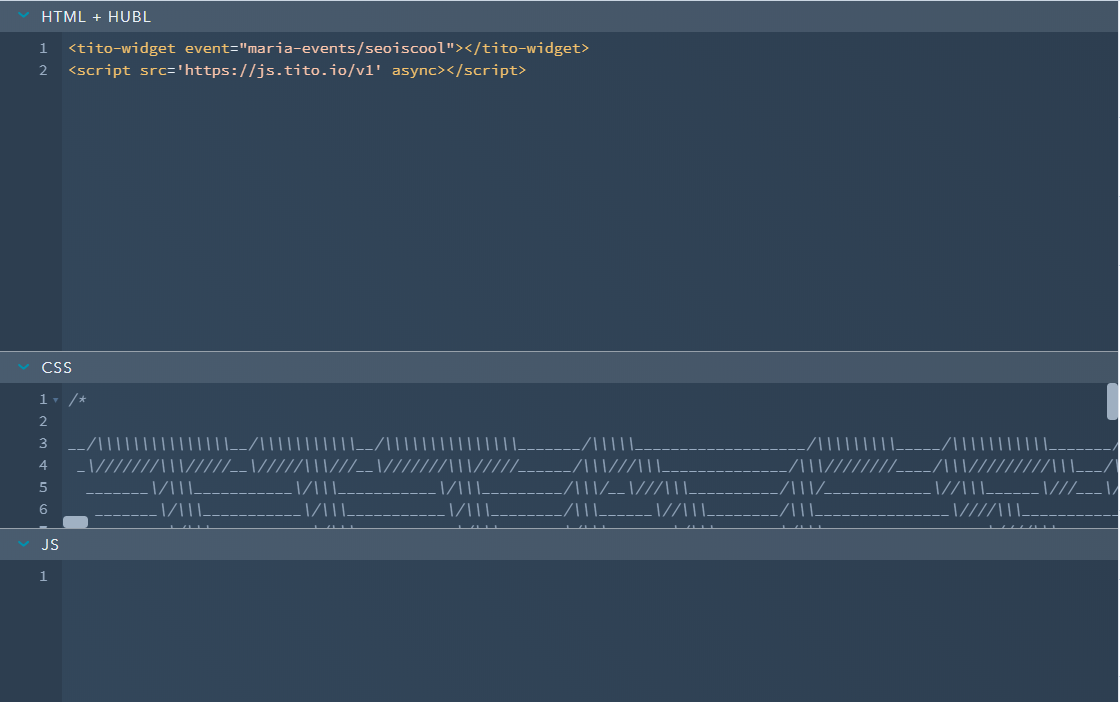
From there, you’ll be brought to the code editor (below) within the design manager where you can simply paste the widget snippet from our docs.
To do this, simply add your HTML and stylesheet (either the default from Tito, or a custom stylesheet you’d like to use) to the relevant fields.
Before:

After:
(Yes, that easy.)
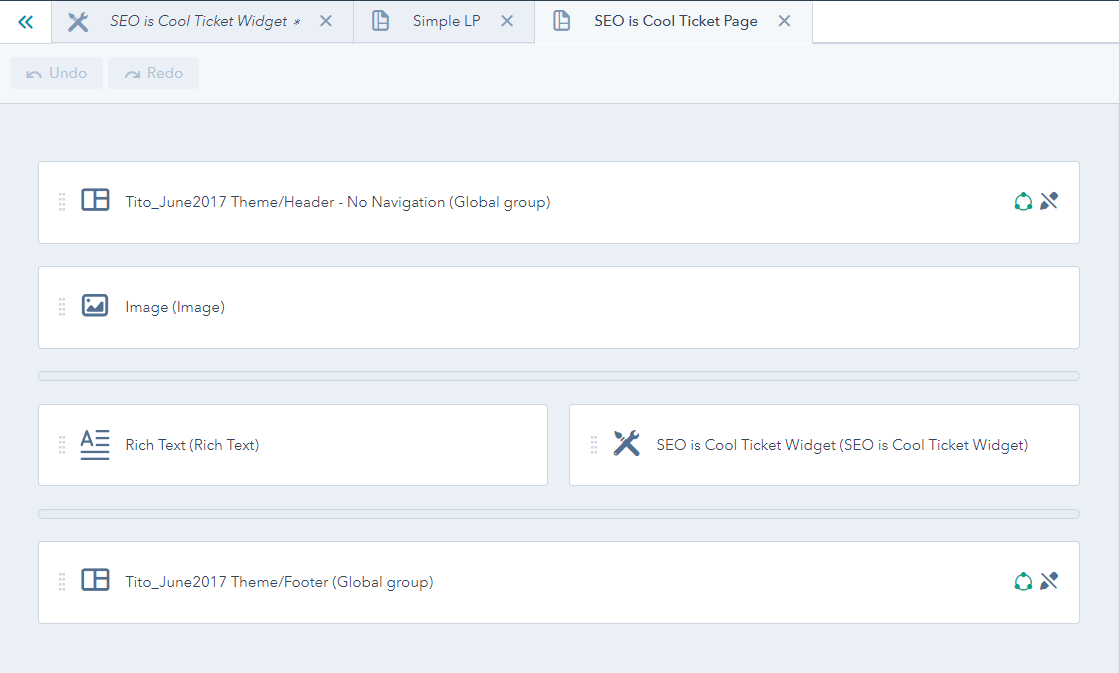
To add this to your HubSpot COS page where you want to sell tickets from, you can add your new Tito widget module using the Drag and drop function in the Page Builder in the HubSpot COS. (Again, below.)
(P.S. if you’d like some inspiration as to how you can Customize the Tito widget for your current site, check out this post.)
Once you’ve done that, you’ll end up with something like this (though you’ll have some more time to work with custom styles that I have for this post.):
Now, that you’ve seen my passion for graphic design, we can go through the two places that are integral to SEO optimisation in HubSpot.
Firstly, the sidebar menu:
And, secondly, the Settings tab:
Most of these are intuitive once you get a grasp on where each element is lain out within the system. Here’s an easy reference:
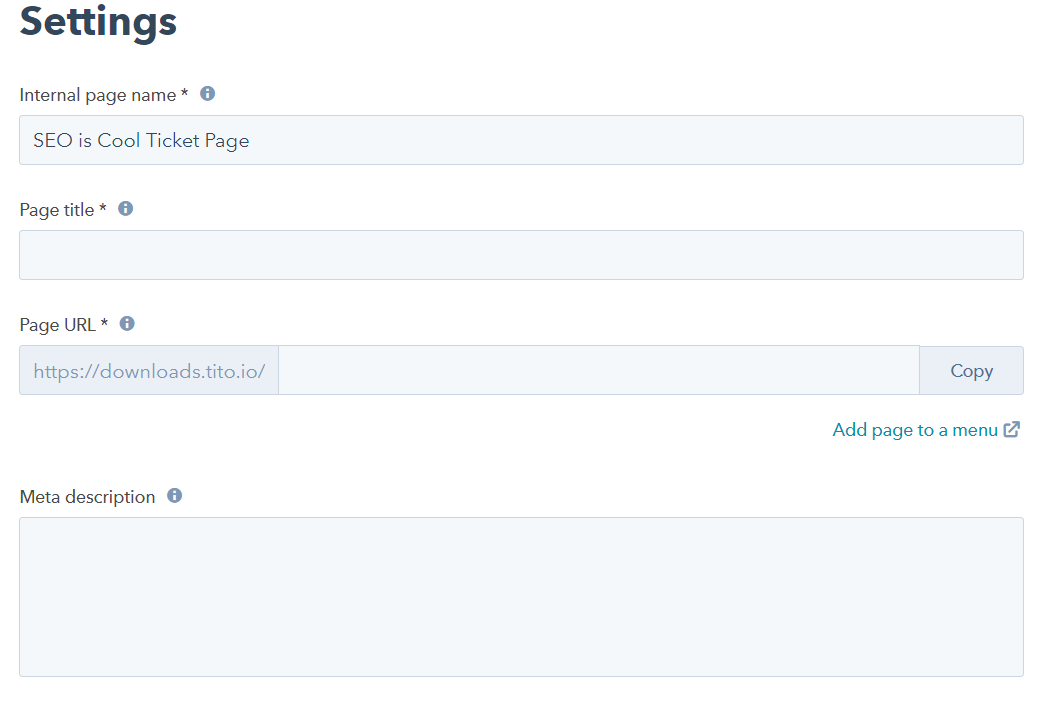
Title/H1 tags:
Can be added to the Page title field. Easy peasy.
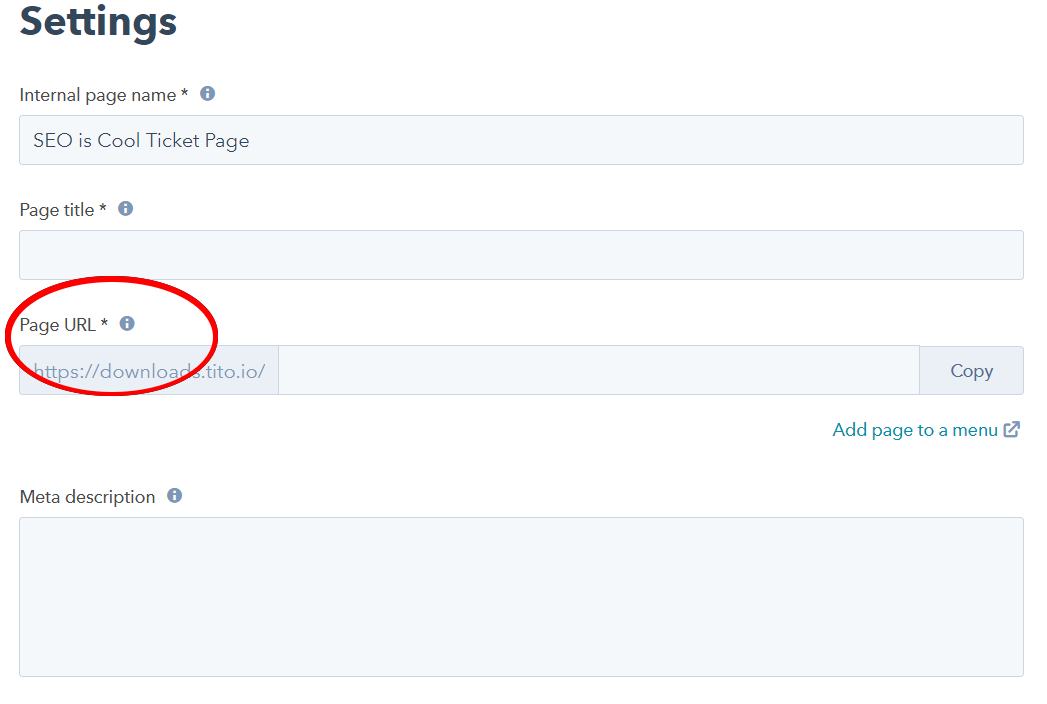
URL:
To add a keyword to your URL, as we did in Tito, it can be added a suffix under Page URL. You’ll notice that there’s a dropdown to the left of this field within the HubSpot COS. If you use HubSpot Pro or Enterprise you’ll be able to edit and track multiple subdomains through the system.
If this is the case, simply check the drop down menu to choose whether you would like to use your main site domain URL or a subdomain that you’ll be using for the conference.
Body keywords:
…can be added in any Rich Text Module which you can add when setting up your page in the Design Manager:
If you’d like, you can edit the default text of that template directly from the Design Manager if this is the one time you’ll be using this template:
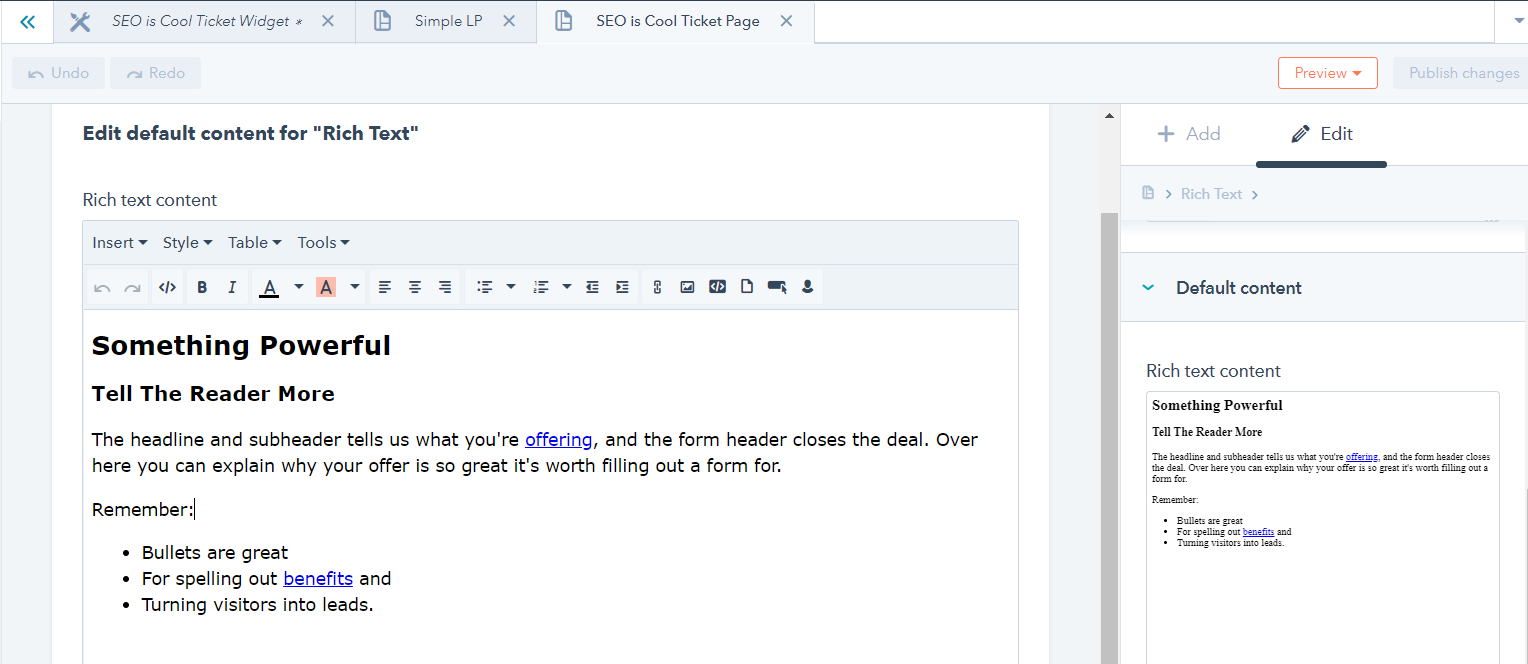
But what a lot of users prefer doing (as they likely prefer to re-use and recycle the templates they create) is to edit the text in the WYSIWYG editor.
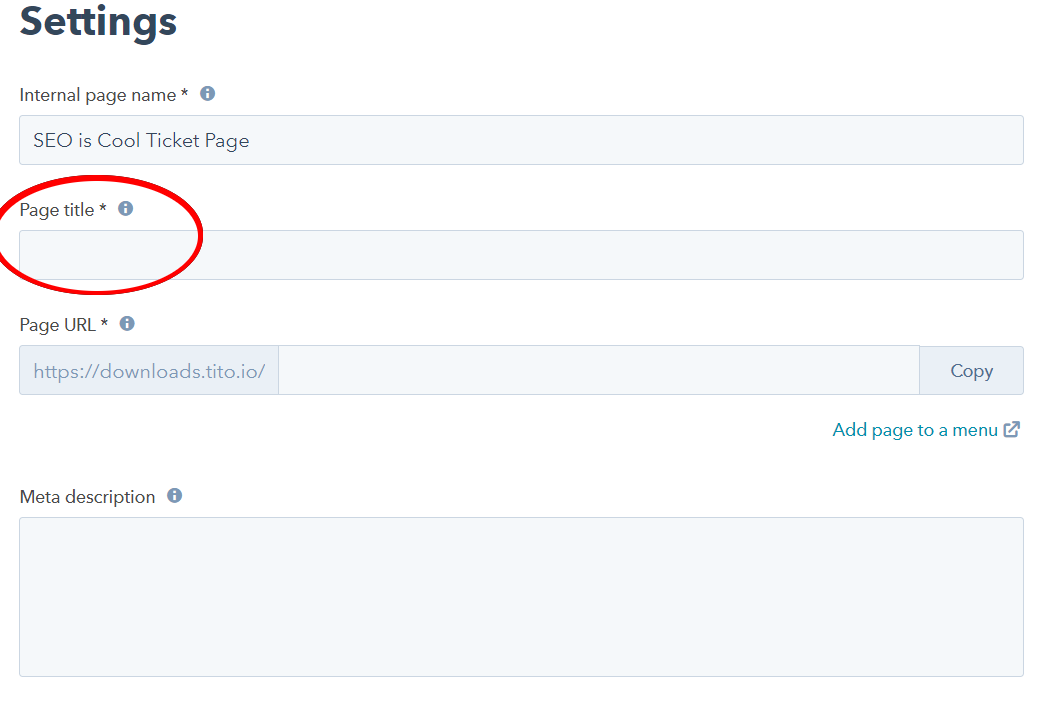
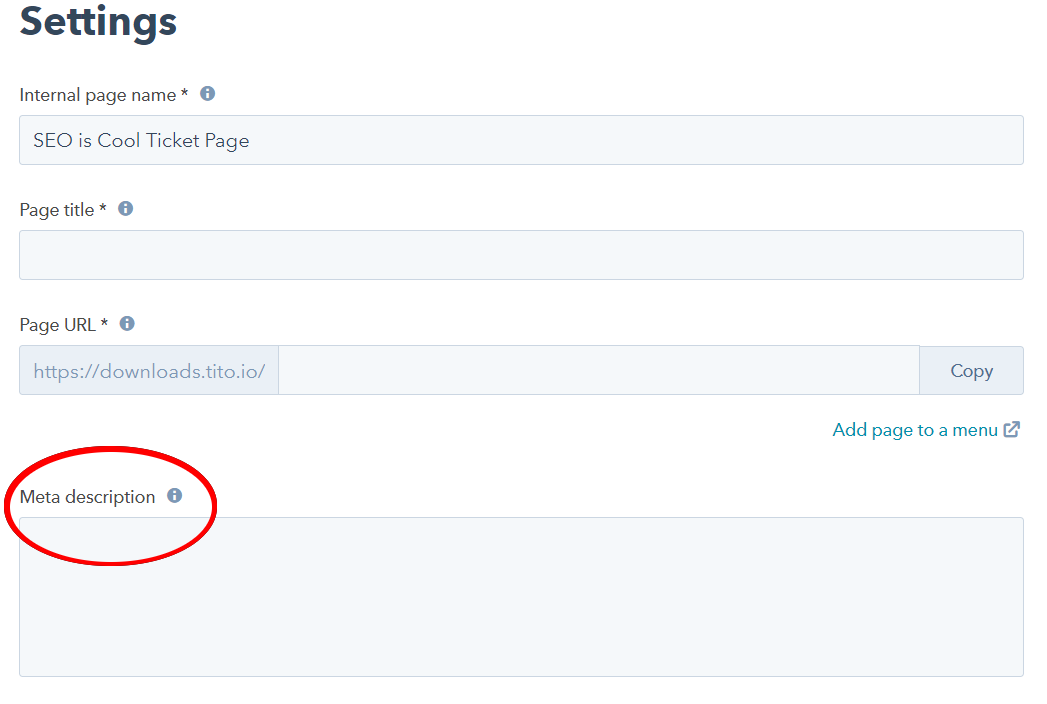
Meta description:
Perhaps the easiest of all, under Meta description:
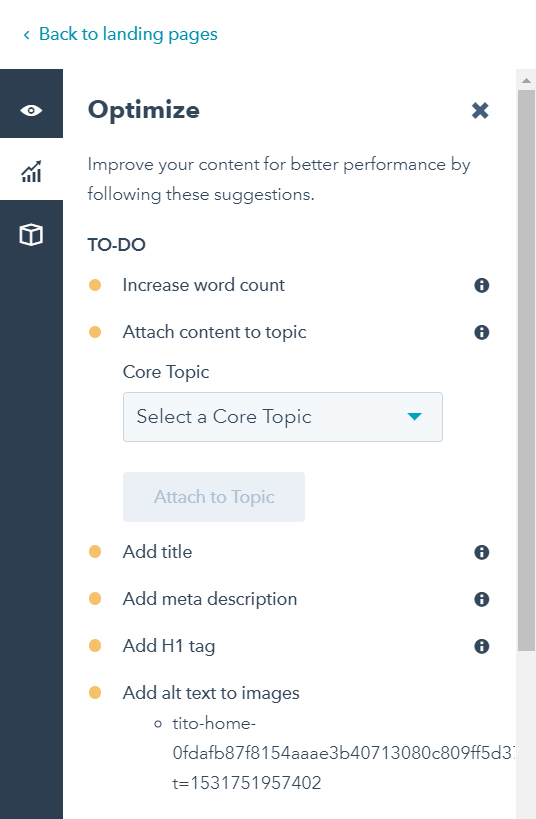
Alt-tags:
Alt-tags are easy to implement in the HubSpot COS as all you have to do is click on an image element and the alt-text field will pop up, prompting you to input your custom alt-tag for each of the images you use on-page. In fact, the Sidebar we mentioned above reminds you to do so if any of the fields are blank before you publish your ticket page.
Here’s an example in action:
(Click to enlarge in new tab ?)
While this tutorial doesn’t even begin to cover the big, sometimes-bad world of optimising your webpages for search engines, it’s a great, effective way to start, and you should be proud of yourself for a) getting to the end of this, and b) beginning on your optimisation projects.
I’ll be providing some future posts about off-page SEO options within the events industry, but I think you’ll agree that’s quite enough for today.