
Quick Tricks #13: Add a schedule to your event homepage
If you’re new to Quick Tricks, welcome! This is our regular series where we show you how to do something cool and/or a bit hidden in Tito.
Today we’re looking at how to add a schedule to your homepage.
What? We’ll show you how to display the dates, times and venues for all the individual elements of your event in a handy timetable under your tickets on the event homepage. The schedule will also be included on the attendee’s PDF ticket, and be reflected in the ICS calendar file.
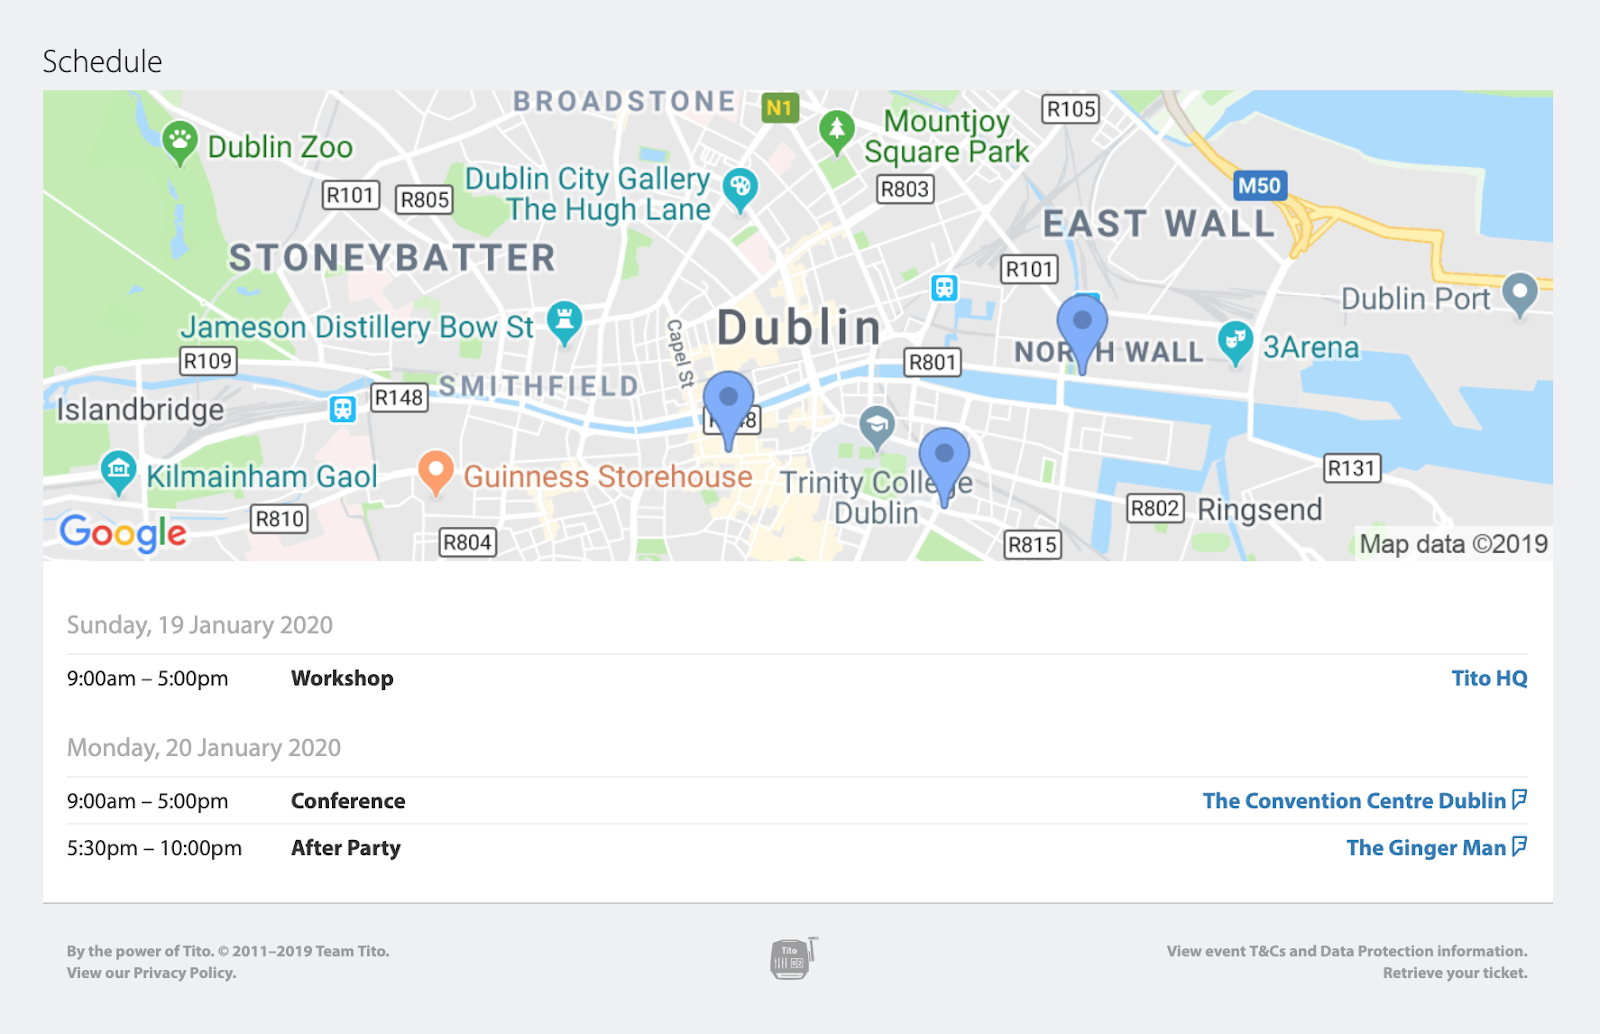
Why? If your event takes place across multiple days and/or venues, or just has a lot of individual components — for instance workshops, a conference and an after party — it can be useful to provide attendees with an itinerary to make sure they know what’s happening when.
Your attendees will be able to get the most out of the event, and you should hopefully receive fewer enquiries about timings.
How? This trick makes use of our Activities feature. Here’s a step by step guide to setting it up:
- Create an Activity for the first element of your event and give it a name, e.g. Workshop.
- (Optional) Add a description.
- (Optional) Set a capacity. This will override your Ticket capacity so be careful not to accidentally restrict how many tickets you sell.
- (Optional) Attach a venue from the list of ones available. You will need to have set these up under the Customize > Location menu first.
- Set the date, start time and end time. This step is mandatory if you want the Activity to appear in the schedule.
- Make sure the box that says “Show this activity publicly” is checked, otherwise the Activity won’t be displayed in the schedule.
- Attach the Activity to any relevant tickets. This is probably the most important step! An Activity on its own doesn’t mean anything — it only becomes relevant when attached to a ticket.
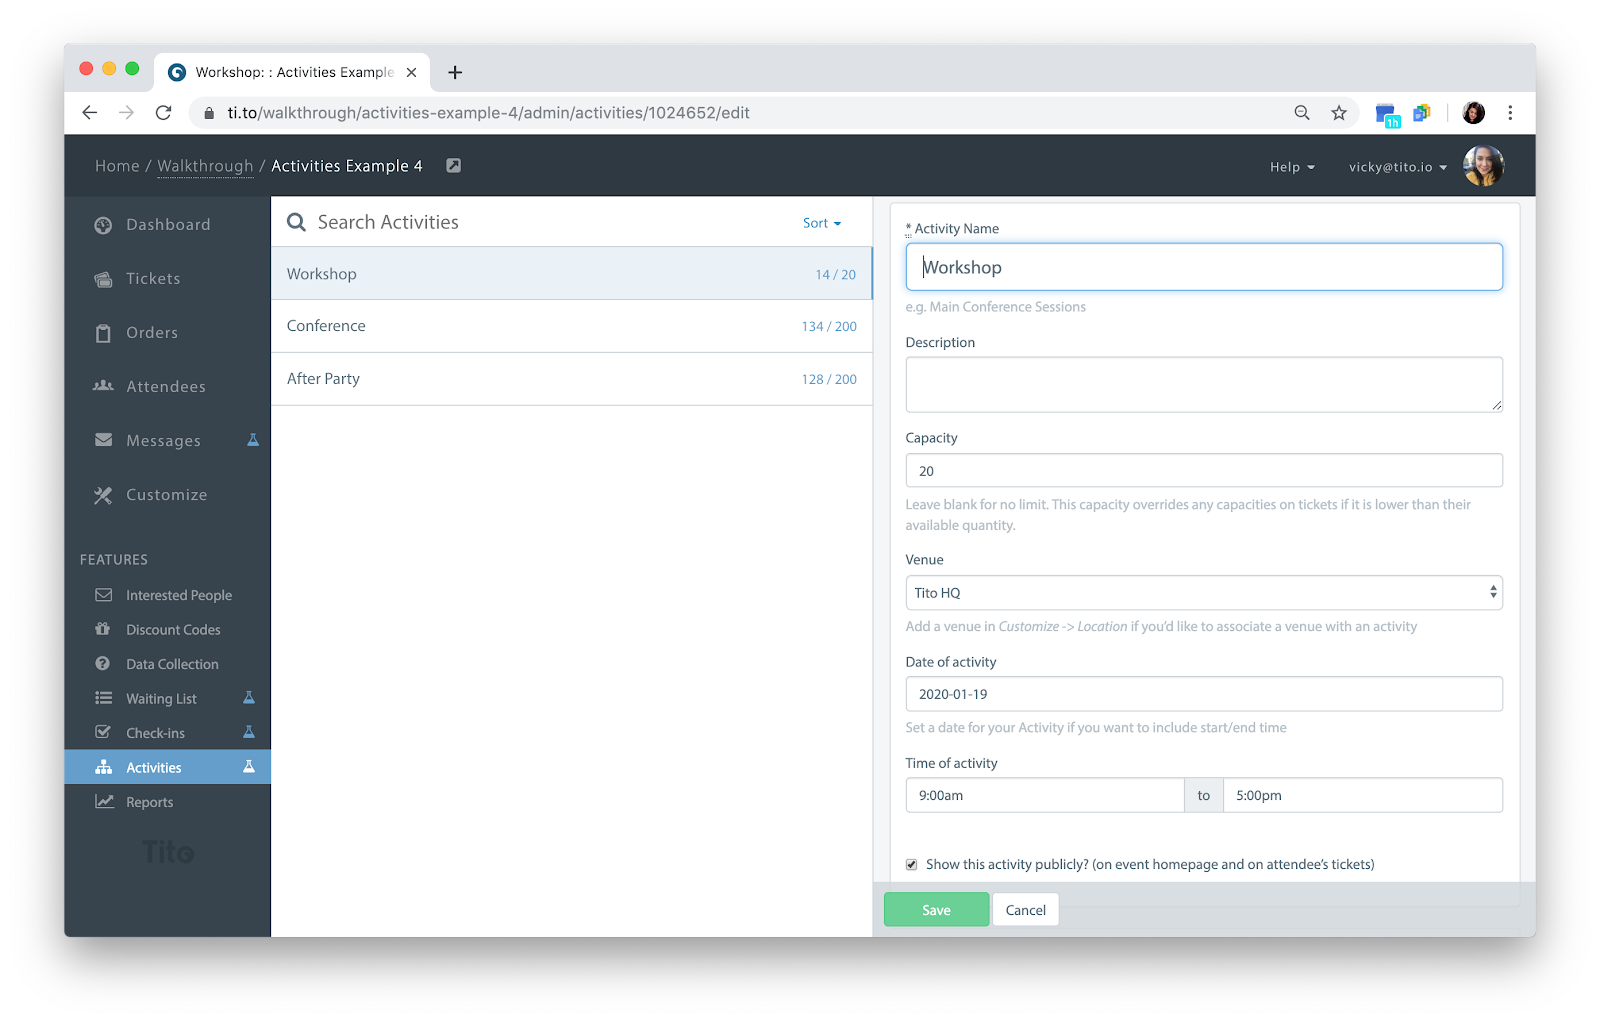
Hit save, and that’s it! A couple of final things to be aware of:
- The schedule will only be displayed while tickets are on sale.
- You can show or hide the schedule under Customize > Homepage > Homepage options.
I hope you enjoyed this Quick Trick. We’ll see you back here in a fortnight for the next one!