
Quick Tricks #14: Add a table using Markdown
Quick Tricks is our fortnightly series of posts to help you level up your Tito skills.
In this post you’ll learn how to leverage the power of Markdown, a super simple coding language, to insert a table in your event homepage.
What? You may already be using Markdown to format text on your event homepage, add headings, or insert images. But did you know you can also use it to format tabular data?
It works in both the Short Description section (at the top of the event homepage) and in the Additional Info section (at the bottom of your event homepage, under your tickets list).
Why? If you’re presenting any kind of numerical information, tables tend to be easier to scan than walls of text. The classic example would be showing pricing tiers and the deadlines to register.
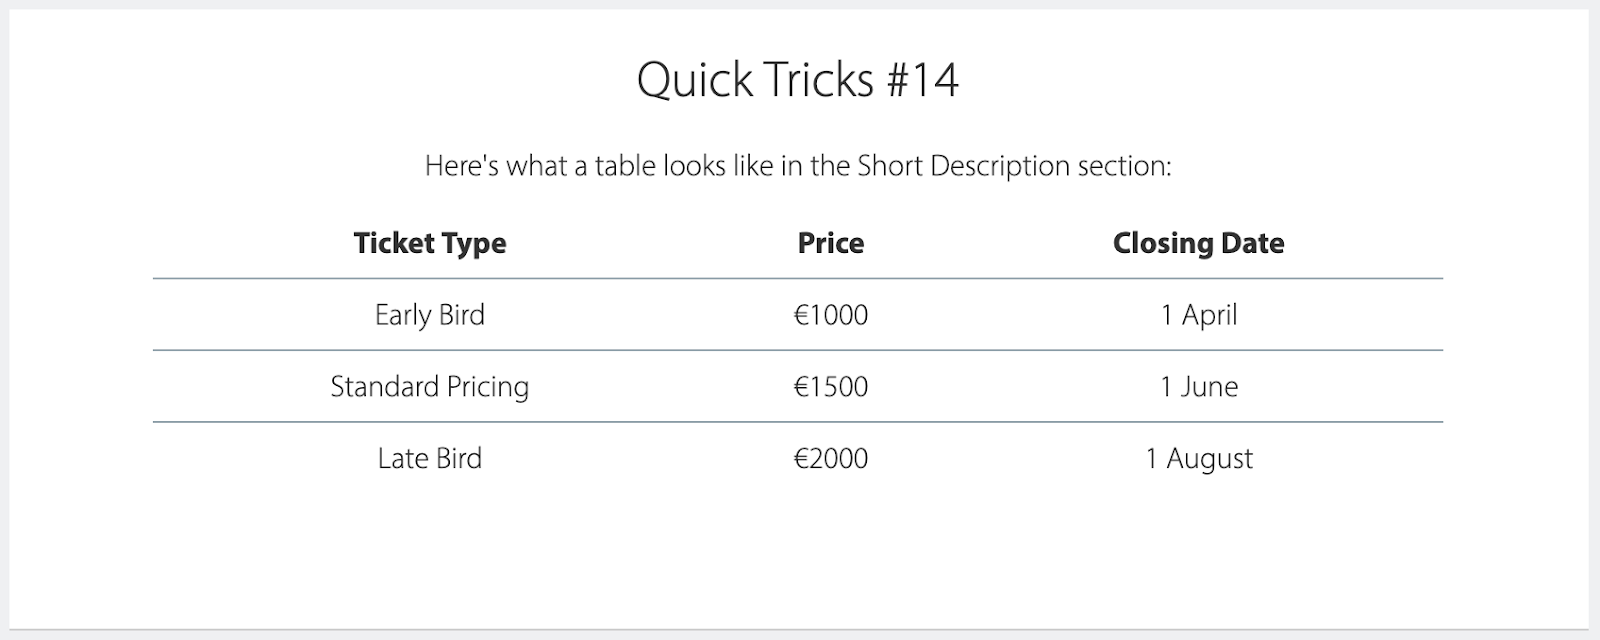
Super neat and easy to digest!
How? You could write the Markdown yourself, but why bother when there are many handy tools that will do it for you? I used this one for the example above.
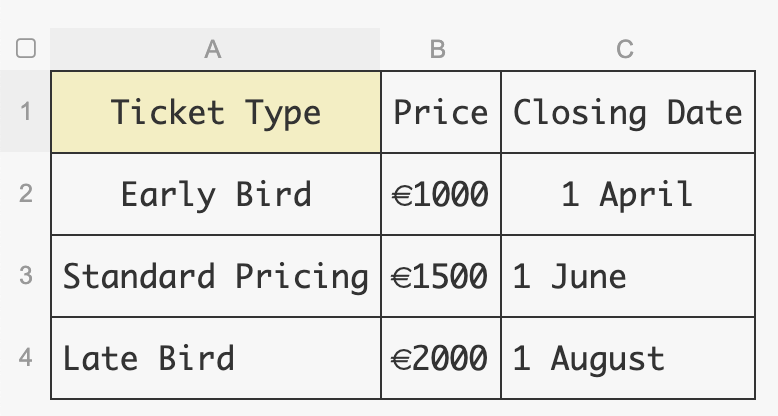
You enter your data into a table editor, like this:
Then hit “Generate” and it spits out something that looks like this:
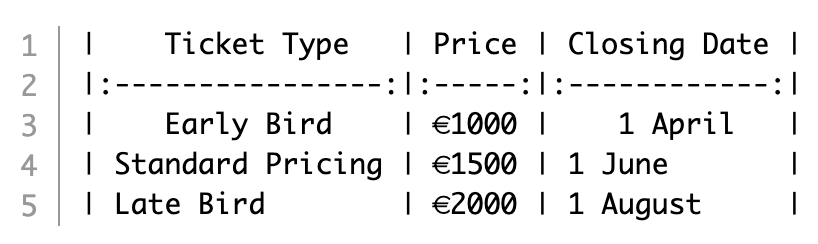
It’s not the prettiest looking thing in the world, but if you copy and paste it into either the Short Description field or the Additional Info field (both found under Customize > Homepage within your event), then hit save, the result on the homepage will be a lot more aesthetically pleasing. And you’re done!
I hope you enjoyed this Quick Trick. We’ll see you back here in a fortnight for the next one.